
Virtual Firewalls (Contexts)
Scenario:
You have worked as a network engineer for many companies, but now you have started your own collocated datacenter. At the starting, due to budget constraints, you want to be smart and decided to share a single physical firewall (Cisco ASA) between two customers i.e. Customer-A and Customer-B.Objectives:
- Both customers should feel that they have a separate Firewall for them.
- None of the Customers should be able to manage others firewall policies.
- Customer-A has opted for Silver plan, so allocate the resources accordingly.
- Customer-B has opted for Gold plan, so allocate the resources as per plan.
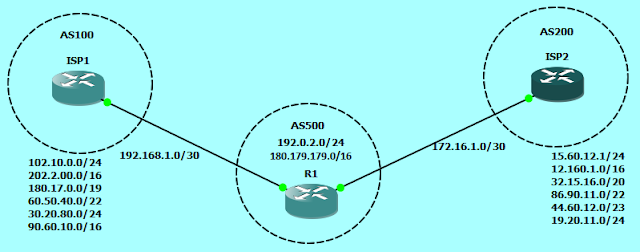
Physical Topology
.png "Virtual Firewalls' Physical Topology")
Logical Topology

Download the gns3 topology here:
Multiple Contexts_solved.rar
Router IOS: c3725-advipservicesk9-mz.124-17.bin
ASA Software version: 8.4(2)
ASA Hardware: ASA 5520
Solution:
Solution to the above scenario is to create virtual firewalls (also called contexts) in Cisco ASA with three contexts, one for Customer-A, second for Customer-B, and the third one will be admin context for Management of the physical box with admin access. To create contexts on Cisco ASA, you'll need to enable multiple mode, using the following command:
To switch back and forth at context and system execution space, use the following commands:
Now, let's configure the contexts. Let's first configure the admin context.
Now, configure the context Customer-A
And configure the context Customer-B
To save the configuration of system as well as all the context, us the following command from the system execution space.
You can change the admin context using the following command
You can see the existing contexts using show context command
CiscoASA# sh context
Context Name Class Interfaces URL
*admin default GigabitEthernet0 disk0:/admin.cfg
Customer-A SILVER GigabitEthernet0, disk0:/Customer-A.cfg
GigabitEthernet1
Customer-B GOLD GigabitEthernet0, disk0:/Customer-B.cfg
GigabitEthernet2
Total active Security Contexts: 3
When you convert the mode of firewall from single to multiple using the command mode multiple, Cisco ASA saves a copy of running-config to flash: under the name of old_running.cfg, and creates a new context named admin with admin privileges. You can verify the config files in the flash using the dir command.
CiscoASA# dir
Directory of disk0:/
5 drwx 4096 11:21:46 Sep 03 2013 log
15 drwx 4096 11:21:56 Sep 03 2013 coredumpinfo
36 -rwx 2218 06:47:32 Oct 06 2013 old_running.cfg
37 -rwx 2093 03:21:18 Oct 08 2013 admin.cfg
38 -rwx 1913 03:21:21 Oct 08 2013 Customer-A.cfg
39 -rwx 1911 03:21:26 Oct 08 2013 Customer-B.cfg
20 drwx 4096 13:20:56 Sep 03 2013 boot
28 -rwx 0 09:27:40 Sep 04 2013 nat_ident_migrate
40 drwx 4096 09:39:28 Sep 06 2013 tmp
268136448 bytes total (267718656 bytes free)
CiscoASA(config)# mode multipleafter which you will be prompted to reboot the ASA. When you convert from single mode to multiple mode, the ASA converts the running configuration into two files: a new startup configuration that comprises the system configuration, and admin.cfg that comprises the admin context (in the root directory of the internal Flash memory). The original running configuration is saved as old_running.cfg (in the root directory of the internal Flash memory). The original startup configuration is not saved. The ASA automatically adds an entry for the admin context to the system configuration with the name "admin". After reboot, firewall will boot into multiple mode and we can proceed towards contexts configuration.
! Enable auto generation of mac-address for shared physical interfaces
mac-address auto
! enable the physical interfaces
interface GigabitEthernet0
no shutdown
!
interface GigabitEthernet1
no shutdown
!
interface GigabitEthernet2
no shutdown
! Create class and assign resources to the class
! that will be used for membership of contexts
class SILVER
limit-resource Xlates 50
limit-resource ASDM 2
limit-resource Hosts 50
limit-resource Conns 500
limit-resource SSH 2
limit-resource Telnet 2
!
class GOLD
limit-resource Telnet 5
limit-resource SSH 5
limit-resource Conns 1000
limit-resource Hosts 150
limit-resource ASDM 5
limit-resource Xlates 150
! allocate a physical interface to the admin
! context so that we can manage the box via SSH.
admin-context admin
context admin
allocate-interface GigabitEthernet0
config-url disk0:/admin.cfg
! Create and configure contexts for Customer-A and Customre-B
context Customer-A
member SILVER
allocate-interface GigabitEthernet0 Untrusted_Intf
allocate-interface GigabitEthernet1 Trusted_Intf
config-url disk0:/Customer-A.cfg
!
context Customer-B
member GOLD
allocate-interface GigabitEthernet0 Untrusted_Intf
allocate-interface GigabitEthernet2 Trusted_Intf
config-url disk0:/Customer-B.cfg
To switch back and forth at context and system execution space, use the following commands:
! In order to change to a context,
CiscoASA# changeto context<context name>
! In order to change to the system execution space
CiscoASA# changeto system
Now, let's configure the contexts. Let's first configure the admin context.
! Assign IP address, security level and name the interfaces
interface GigabitEthernet0
nameif OUTSIDE
security-level 0
ip address 192.168.1.1 255.255.255.0
! Enable SSH access as desired, here we'll allow SSH access for all
ssh 0.0.0.0 0.0.0.0 OUTSIDE
aaa authentication ssh console LOCAL
! configure a default route
route OUTSIDE 0.0.0.0 0.0.0.0 192.168.1.10
! create a user, which will be used to manage the context
username admin password *****
Now, configure the context Customer-A
! Assign IP address, security level and name the interfaces
interface Untrusted_Intf
nameif OUTSIDE
security-level 0
ip address 192.168.1.100 255.255.255.0
!
interface Trusted_Intf
nameif INSIDE
security-level 100
ip address 172.16.0.1 255.255.255.0
! Enable SSH access as desired, here we'll allow SSH access for all
ssh 0.0.0.0 0.0.0.0 OUTSIDE
aaa authentication ssh console LOCAL
! configure a default route
route OUTSIDE 0.0.0.0 0.0.0.0 192.168.1.10
! create a user, which will be used to manage the context
username user1 password *****
And configure the context Customer-B
! Assign IP address, security level and name the interfaces
interface Untrusted_Intf
nameif OUTSIDE
security-level 0
ip address 192.168.1.200 255.255.255.0
!
interface Trusted_Intf
nameif INSIDE
security-level 100
ip address 10.0.0.1 255.255.255.0
! Enable SSH access as desired, here we'll allow SSH access for all
ssh 0.0.0.0 0.0.0.0 OUTSIDE
aaa authentication ssh console LOCAL
! configure a default route
route OUTSIDE 0.0.0.0 0.0.0.0 192.168.1.10
! create a user, which will be used to manage the context
username user2 password *****
To save the configuration of system as well as all the context, us the following command from the system execution space.
CiscoASA# write memory all
You can change the admin context using the following command
admin-context <context_name>
You can see the existing contexts using show context command
CiscoASA# sh context
Context Name Class Interfaces URL
*admin default GigabitEthernet0 disk0:/admin.cfg
Customer-A SILVER GigabitEthernet0, disk0:/Customer-A.cfg
GigabitEthernet1
Customer-B GOLD GigabitEthernet0, disk0:/Customer-B.cfg
GigabitEthernet2
Total active Security Contexts: 3
When you convert the mode of firewall from single to multiple using the command mode multiple, Cisco ASA saves a copy of running-config to flash: under the name of old_running.cfg, and creates a new context named admin with admin privileges. You can verify the config files in the flash using the dir command.
CiscoASA# dir
Directory of disk0:/
5 drwx 4096 11:21:46 Sep 03 2013 log
15 drwx 4096 11:21:56 Sep 03 2013 coredumpinfo
36 -rwx 2218 06:47:32 Oct 06 2013 old_running.cfg
37 -rwx 2093 03:21:18 Oct 08 2013 admin.cfg
38 -rwx 1913 03:21:21 Oct 08 2013 Customer-A.cfg
39 -rwx 1911 03:21:26 Oct 08 2013 Customer-B.cfg
20 drwx 4096 13:20:56 Sep 03 2013 boot
28 -rwx 0 09:27:40 Sep 04 2013 nat_ident_migrate
40 drwx 4096 09:39:28 Sep 06 2013 tmp
268136448 bytes total (267718656 bytes free)


thanks for posting.
ReplyDeleteThanks
ReplyDelete